

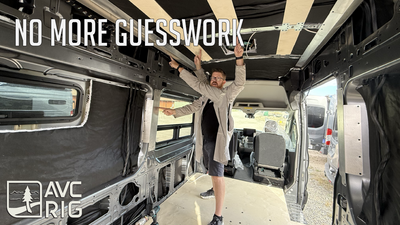

Van Build Guide: Installing the Ford Transit Furring Kit System
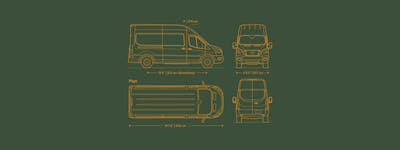
Tackling the curved, egg-like interior of a Ford Transit can feel like trying to fit a square peg in a round hole. To make installing wall and ceiling panels straightforward. In this episode, we walk through how to install their custom aluminum furring kit system on a Ford Transit High Roof 148 long body van (similar process for the other body styles).
What’s in the Furring Kit System?

The system consists of three main components, all sold a la carte or available as a bundled kit:
-
Wall-to-Ceiling Support
-
What it is: A simple piece of .063-inch aluminum bent to 115 degrees that creates a clean transition line between your ceiling and wall kits.
-
Note: This comes included with all AVC wall kits (paper pattern, felt, or birch) because it's essential for a successful install.
-
-
Ceiling Furring Kit
-
Components: Includes a rear support piece that aligns with factory holes above the D-pillar, plus individual aluminum brackets that mount over each factory roof rib.
-
Wood Shims: Designed to bridge 1/4-inch Baltic birch strips (or your own custom-cut wood) between the ribs to give your ceiling panels a flush, secure mounting surface.
-
-
Wall Furring Kit
-
Components: Precision-engineered, unique pieces designed for tricky spots around the van, including the driver-side B-pillar (behind the driver's seat), the C-pillar (along the sliding door), and D-pillar wall supports.
-
Why it helps: Eliminates the headache of measuring, cutting, and splicing custom wood frames to get your wall kits to sit flat.
-
3 Ways to Install Your Furring Kit

Depending on your preference for hardware and van penetrations, you can choose from three installation methods:
-
Adhesive Only (No Holes): Use a body adhesive like 3M 550 and gorilla tape to hold pieces in place while it cures, avoiding any metal shavings or wall penetrations.
-
Rivets: Fasten temporarily with screws, match-drill the holes, pull down and prime the bare metal, and use standard 3/16-inch rivets for a rust-protected finish.
-
Self-Drilling Screws: The method used in the shop. A baggie of self-drilling screws is included so you can securely screw the kit straight into place as soon as it arrives.
Step-by-Step Installation Overview
1. Wall-to-Ceiling Supports
-
Position the support so the 3-inch leg mounts flat against the roof where the roof rib transitions.
-
Extend the support slightly forward past the front of the living area to ensure a cleaner, more seamless fabric or panel transition later on.
-
Route pre-existing factory wiring harnesses over the top of the supports to keep them neatly out of the way. Secure with screws into the ceiling ribs.
2. Ceiling Furring Kit 
-
Rear Support: Install the rear ceiling support piece behind the factory wiring near the rear view camera, lining up the factory alignment holes above the D-pillar.
-
Rib Brackets: Mount an individual aluminum bracket over each factory roof rib using the pre-aligned factory holes.
-
Wood Strips: Slide your 1/4-inch wood shims across the tabs between the ribs and secure them using wood screws in the corners. This creates a solid, uniform plane to mount your final ceiling panels.
3. Wall Furring Kit 
-
B-Pillar: Attach the driver-side B-pillar support directly behind the driver's seat to flatten out the curved transition zone.
-
C-Pillars & D-Pillars: Work your way around the driver and passenger sides, matching up the labeled unique pieces (like the D-pillar supports marked with directional arrows) to provide flat, secure mounting anchors for your wall panels.

Check Out the AVC Builders Guide & Shop
Looking for more step-by-step help? AVC RIG is rolling out a comprehensive Builders Guide featuring 360-degree camera images and detailed phases to walk you through your camper van conversion.
-
Shop parts & furring kits: AVC RIG
-
Watch the installation video on YouTube: How to Frame a Ford Transit Van (Walls & Ceiling Made Easy)


