




Upgrading Your Ford Transit Audio: Emphaser Speaker Installation Guide
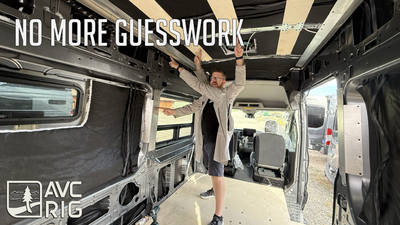
If you are looking to upgrade the sound quality in your Ford Transit, replacing the factory speakers is one of the best ways to do it. In a recent video from the shop, Matt walked through the process of installing an Emphaser audio speaker upgrade kit. This step-by-step Emphaser speaker installation guide covers what comes in the kit, the tools you will need, and how to complete the installation yourself.

Why Upgrade to Emphaser Speakers?
The Emphaser speaker kit is a direct factory-mount upgrade designed specifically for the Ford Transit. Key benefits include:
-
Higher Quality & Wattage: The speakers are much higher quality than stock and can handle significantly more wattage.
-
4-Piece System: The kit includes two 6-inch main door speakers and two A-pillar tweeters featuring built-in high-pass filters.
-
Plug-and-Play Wiring: Everything is pre-wired to plug directly into the Ford factory harness, meaning no custom wiring or crimping is required.
-
Better Clarity: Greatly improves audio clarity for voice actors on audiobooks during long road trips, while also offering a fuller sound and deeper bass for music.

Tools Required
Before you start taking your van apart, make sure you have the following tools ready:
-
T20 and T25 star bits
-
7mm and 10mm deep-well sockets
-
Panel popper tool (or a pin tool) to safely remove plastic plugs and covers
-
A power driver to speed up the hardware removal process

Emphaser Speaker Installation: Step-by-Step Guide
Step 1: Upgrading the A-Pillar Tweeters
-
Remove the Handle Covers: Pull out the small plastic covers on your A-pillar handle to expose the mounting screws.
-
Take Out the Screws & Handle: Remove the screws, then pull the A-pillar plastic trim straight out, as it is held in place with simple friction clips.
-
Swap the Tweeters: Use a pin tool to release the plastic clips holding the factory tweeter, then pop the Emphaser tweeter right into the same housing.
-
Secure the High-Pass Filter: Peel the self-adhesive double-stick tape off the high-pass filter, stick it to the vent, and plug it into the factory harness.
-
Reinstall Trim: Carefully align the vent so the defroster and side-view mirror views are unobstructed, seat the A-pillar behind the bulb seal using a panel tool, and reinstall the handle.

Step 2: Removing the Door Panel
-
Locate Perimeter Screws: There are several screws hidden around the perimeter of the door, including behind the handle, inside holders, and behind the side reflector.
-
Pop Plastic Covers: Use a plastic panel popper tool carefully to expose the hidden screws.
-
Remove Hardware: Use a 7mm socket for the majority of the perimeter screws, a T20 star bit for the lower screws, and a T25 star bit for the screws behind the handle.
-
Detach Panel: Give the door panel a firm pull to pop the clips, then lift it up and shimmy it off the bulb seal.
-
Disconnect Wires: Press the detents on the wiring harnesses behind the handle to disconnect the door release, locks, and window switches.

Step 3: Replacing the Door Speaker
-
Remove Old Speaker: Disconnect the factory speaker plug and use your 7mm socket to remove the three mounting screws.
-
Add Sound Dampening (Optional): If desired, this is the ideal time to stuff sound dampening material into the door cavity—just ensure it stays clear of the window track.
-
Mount the Emphaser Speaker: Position the new speaker into the factory holes with the clip facing up, and use the original hardware. Starting with the bottom screw helps align the top two holes.
-
Plug In: Connect the speaker using the factory plug.

Step 4: Reassembling the Door
-
Reconnect Electronics: Plug the window, lock, and door handle harnesses back into the door panel.
-
Seat the Panel: Align the panel over the top bulb seal, making sure it goes in properly, then snap all the Christmas tree clips back into place.
-
Replace Hardware & Covers: Reinstall all perimeter screws and snap the plastic plugs, handle inserts, and side reflectors back into their spots.

Final Thoughts on the Emphaser Speaker Installation
With everything bolted back together and plugged into the factory harness, the difference in sound quality is massive. Whether you are listening to audiobooks on a long cross-country trip or turning up your favorite music, this upgrade delivers a much cleaner, fuller sound experience for your Ford Transit.
Ready for your own Emphaser speaker installation? Shop the EMPHASER Front Sound Upgrade for Ford Transit and browse more Ford Transit van accessories.
See the full video on YouTube here: How to FINALLY Get Good Audio in Your Camper Van


